Super-easy to make, but time consuming. I made these when I had to stay at home to take care of Titus who had a fever. He spent the day on the sofa, but felt a lot better when these were finished. I got the recipe from one of my very favorite bread bloggers, Pain de Martin. (Recipe in Swedish.)
I used about 25 g of yeast whereas Martin specified 10 - mine was past it's "best before"-date, so I figured it might need an extra boost. Use your discretion. It's a low-yeast recipe in any case, because of the long rising times.
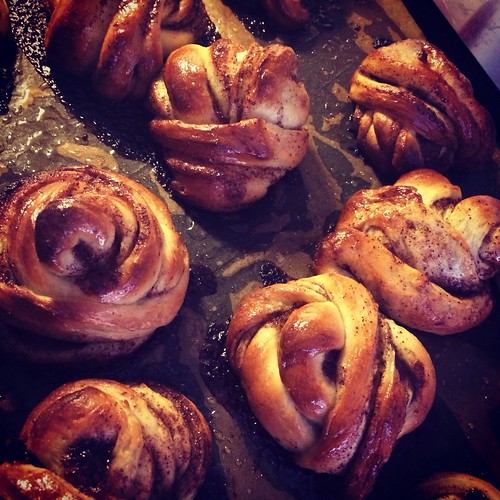
No-Knead Twisted Cinnamon Buns
about 30
10-25 g fresh yeast
250 g water, cool
250 g milk, cool
150 g butter (at room temperature)
150 g sugar
6 g salt
10 g cardamom, freshly ground in a pestle and mortar
900-950 g strong bread flour (not all at once)
Cinnamon filling:
200 g butter, at room temperature
175 g sugar
20 g cinnamon
1 tbsp flour
a little water
Sugar Vanilla Syrup:
100 ml water
100 ml sugar
1/2 vanilla bean, scraped out
I used my Kitchen-Aid, but you can do this by hand. Mix yeast, butter, sugar and salt until smooth, and add water, milk, cardamom and about half of the flour. Mix until well combined, then add the remaining flour, a little at a time. You should have a fairly stiff dough. No need for kneading, but make sure it's all come together. Cover with plastic and leave at room temperature for about 90 minutes.
After this, the dough should have risen a bit. Turn it out onto a very lightly floured surface, and fold it a few times. You want it to be fairly square shape. Again, cover with plastic and leave it for another 90 minutes. Meanwhile, prepare your filling - just beat butter, sugar and cinnamon together until smooth, then add a little flour and a little water to make it perfectly spreadable.
When your dough looks nicely puffy, flour your rolling surface, and get rolling. Aim for about 80*50 cm - mine was a little smaller, I don't have awesome rolling skills. Make it as even as possible, though.
Spread on your filling, nice and even. Now fold your dough - in thirds from the top, like you would a letter? I hope that makes sense. Give it a quarter turn so that the long side is closest to you. Roll it a little, aim for about 60*25 cm.
Now come the tricky part, the twisting. Cut thin strips of the dough. Fold twice around your fingers then on top of itself - Martin made a very helpful little video of this because my description is clearly lacking. It's easier than it sounds, if that's any relief.
Let the buns rest on a baking sheet for another hour. Then, bake at 225°C for about 10-12 minutes. Make your syrup - combine water and sugar and vanilla, bring to a boil and let cook for about a minute. When your buns come out of the oven, immediately brush them with syrup to make them nice and shiny.
Eat!