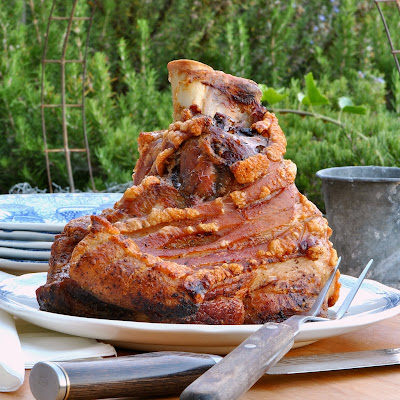
NOSE to tail
i suppose you are only here if you are TRULY into nose to tail eating...OR if this purely fascinates or disgusts you.
maybe just a LOOKY-LOO ?
BUT think of it this way...
THAT WHOLE PIG GAVE UP IT'S LIFE FOR YOUR SLICE OF BACON.
we need to think out of the box...away from the "chop"
i know here in So California there isn't a lot of enthusiasm, but
i'm trying to do my part...
piece by piece
piece by piece
WARNING...PUT YOUR GAME FACE ON !
i'm pretty good with "odd-bits", but this was a doozy.
i hate to say it, but the pre-boil stinks. ooo boy, it's bad. i mean it smells like a "pig sty"
not to worry...only the pre-boil smells. it will go away.it's always important to do a "pre-boil".
this is a skinny-dip in boiling water for 10-15 minutes. since these are some odd bits, maybe someone did not take care of them as they would a prized tenderloin, so you need to pre-boil to remove any impurities, contaminates and what-nots...
cover your bits with water and bring to a boil for about 10 minutes. remove from pot and toss the water. clean your pot and start fresh.
ALSO...if there are any hairs that might have been missed, you can shave those off with a cheap razor or singe them off, as i do, with a brulee torch.
photo before going in oven
WHAT YOU'LL NEED....
2-3 snouts
3/4-1 lb. of pork shoulder cut into large pieces
1-2 large white onion, sliced thick
8-10 cloves garlic, peeled and smashed
1/2 small can chipotle in adobo sauce.
approx. 2 cups of homemade stock...i used turkey/chicken
cumin, coriander, mexican oregano, chili powder, pepper corns, fresh ground pepper and salt
liberally sprinkle your seasonings all over and inside the cavity of the snout and meat....
NOTE...there are no exact measurements here, just use your judgement.
pre-boil the snouts as mentioned above.
add thick sliced onions to the bottom of dutch oven. i always use cast iron enamel. stuff the inside of the snout with the chunks of pork shoulder. arrange snouts as you wish. i did it this way so the main part of the snout would not be submerged in the stock. stick your crushed garlic, peppercorns, bay leaves and chipotle peppers and adobo sauce evenly throughout. i used about 1/2 a can...the broth was SPICY!
put in a 320 oven for the first hour. take it out and check it. lower heat to 300 F for another hour. at this point i used a baster to remove some of the stock/juices. (save this extra broth, you might need to add some back in.) i wanted a braise, NOT a boil. the onions will release a lot of juice. you want the top part of your goodies showing so they will get a nice brown, golden roasty look (as shown below).
baste a few times when you do your peeking. ALSO, make sure there is still some liquid in the bottom. i think for the last hour i left the lid "ajar". put back in the oven for approximately 1 more hour, but check it again in 1/2 hour. baste again. they should be very fork tender, but not falling apart and disintegrating.
NOTE...if you really are interested and would like a little more info, please leave a comment with your questions.
NOTE...if you really are interested and would like a little more info, please leave a comment with your questions.
this is what it looks like after approx. 3 hours.
straight out of the oven these are quite delicious.
IMAGINE PORK BELLY ON STEROIDS
melt in your mouth fatty gelatinous skin with a fine layer of meat and chunks of "confit-style" pork shoulder cooked inside the fatty nose. it's very hard to describe, but definitely a nose-to-tailers delight.
PERFECT FOR STREET TACOS...
cut into bite size pieces and sear in a hot skillet
a little chopped white onion and cilantro
a squeeze of fresh lime with some pickled jalapeno.
wrap in a fresh corn tortilla
when in DOUBT...
make a TERRINE de SNOUT
i had no idea what on earth i was gonna do with 3 huge pig snouts. there's no way anyone in this house would join me and as you can see they do not shrink much in the cooking. i ended up making 2 small "Terrine de Snout" (gave one away) and froze a whole snout in the spicy viscous broth for future use. if serving cold, your terrine might need more salt. cold terrines usually need extra flavor. do a taste test. remember to put the tip of the snout down first if you want the shock value presentation shown in photos.
IF YOUR GOING TO MAKE A "SNOUT TERRINE" YOU BETTER MAKE IT LOOK LIKE A SNOUT TERRINE!
keep the shoulder meat tucked into the snout cavity and press the larger pieces of extra snout in and around the main piece. pour a little broth into the terrine and press down to eliminate overflow. put something flat over the top and weight it down. i use a brick covered in tinfoil and a baggie. put this in the fridge until it is set. serve cold in thin slices with charcuterie OR cut off what you want and sear in a pan (it will break apart, but who cares?). add to noodles, make tacos, add to soup, fry it up and make snout chicharones?
ANYWAY YOU TRY IT WILL DEFINITELY BE EXPERIENCE...
GO AHEAD...I DARE YA
CROSS THIS ONE OFF YOUR BUCKET LIST!


